
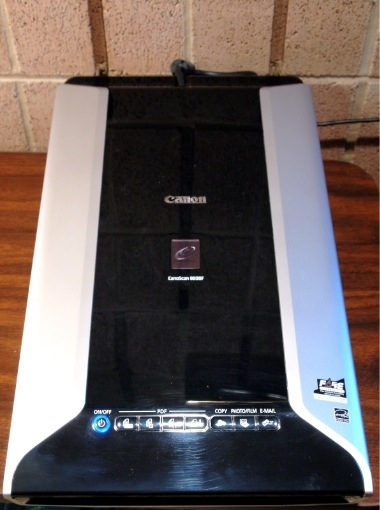
 After playing with the CanoScan 8800F combination film/flatbed scanner, I've taken the time today to write up a quick review of the unit, and also to give some helpful tips when scanning film. For all of you full-frame nuts out there that shoot into the sprocket holes or to the very edges of your medium format film, I invite you to skip ahead in the review, as I ran into a bit of a software issue when scanning without the film masks provided.
The CanoScan 8800F is replacing a flatbed scanner I had for years (also a Canon), but lacked the ability to scan film. A film scanner needs a backlight to properly push light through the film and into the imaging sensor. Trying to rig up some backlighting contraption with a lamp or a cellphone yielded some pretty awful looking scans. I decided to go ahead and bite the bullet, and plunk down the $180 or so it cost (a Lomo LC-A would cost more than this) on the scanner. I got a pretty good deal from Buydig.com, and had it in a little over a week.
 It comes really well packed, the film guides provided work really well as long as you're not planning on doing full-framed scans, and the scanning software works pretty great with Photoshop. I also really like that this one is powered with an AC wall adapter instead of through the USB port like my old scanner.
 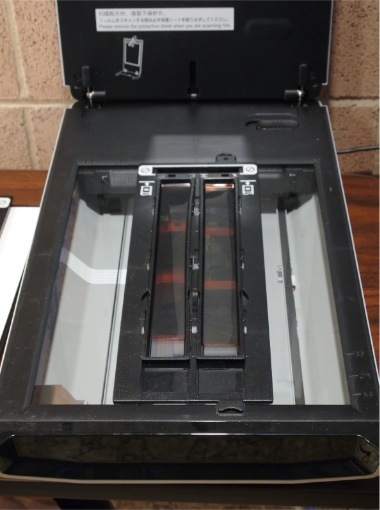 I had it up and running in about 10 mins, scanning some prints just to test it out. The real joy came when I tossed some 35 mm film into the film guides. It worked like a charm, doing everything I expected it to. Scans are pretty slow when going above 1000 DPI, but there is no warm up time with this scanner since all the illumination comes from LEDs.
 Ah, but I always like to make life difficult, and I wasn't really happy until I was certain I could scan full frame negatives, from 35 mm on up to 120. It turns out you can, with a little tweaking.
 First, you're going to have to mask off the area illuminated by the backlight. This I accomplished by using blue painter's tape (no sticky residue left behind) and using the lid to approximate where on the platen the backlight covers.
 Then, after making sure the area was as free of dust as an Intel chip factory, I placed the negatives on the glass, keeping a portion of the glass clear of film along the topmost edge of the platen (the scanner needs this area clear to calibrate itself, you can see where by looking at the top edge of the film guides).
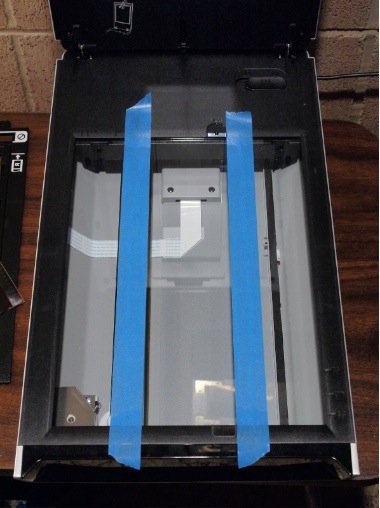
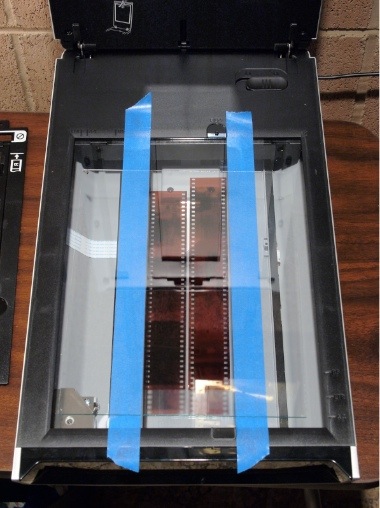 Then it was simply a matter of using a piece of clean glass (you can hardly see it in this pic, it's so clean!) to weigh down the negs and keep them flat.
 BUT, and this is where I spent a good long time pulling my hair out, when I tried doing a preview scan, this is what I got:
 Click the photo to see it in full size.
I got the crazy blue, "What are you doing, Dave?" color cast from the scanner. Presumably because it has no idea where to set the black point without the film guides in place. But, with a little fooling around, I figured it out and here's how to set it right:
First, make a selection small enough to fit inside part of the scanned film that does not include any direct light from the backlight. This means no sprocket holes, too.
 Click the photo to see it in full size.
Once you've done that, look over at the Exposure/Tone Settings menu on the right column of the scanning window. Click the Reset button, then check the Manual Exposure box (leave the value set at 100%), and then hit the Apply button.
Now you can drag out your selection to cover the whole area of the negative you'd like to scan.
 Click the photo to see it in full size.
Tah-Dah! Now all you have to do is set your DPI (I use 1000-1200 for 35 mm) and hit the Scan button.
I hope that helps! You'll probably have a bit of retouching to do in photoshop to cover up any specks of dust, but a lot of that can be avoided by using an anti-static brush to clean your negs right before you place them on the scanner, and by making sure your platen glass is super clean each time you go to scan.
Thats all! Enjoy yourself and the freedom provided by being able to scan it yourself instead of having a lab do it.
Happy Snapping!


5 comments:
I see that you can scan the 120mm film with this device, right ?
Yes, indeed you can.
Using the tape method I described in the post you can get full frames including the very edge of the film strip, or you can use the 120 film guide the scanner comes packaged with, but that crops the film somewhat.
-Steven
I just got this scanner and was worried about the fact that it didn't look like it could scan full frames. Very happy that it can. Thanks for showing how its done!
You're very welcome Durkin! Keep up the great work over on your site!
Wow. I didn't knew it can scan 120mm film slides as well. Thanks for the info.
Post a Comment